Table & Chair for Medical ,Cusmetic, Spa Table for Medical, Chair for Medical ,Cusmetic Spa Zhongyu Mechanical Equipment Firm , http://www.ywtattoogoods.com
1...Production Description:
Putty Impression Material provides all the benefits of a true putty, including higher consistency and insertion force than heavy body materials. Plus, it is designed exclusively for use with Mixing Unit-enabling reliable and reproducible dosage.
Â
All impression materials get warmer-and therefore set faster - when placed in the mouth. Putty material exits the 2 unit at approximately 97ºF, because Putty is already warm when it is seated in the mouth, it helps warm up the wash material, actually accelerating setting time without reducing the intra oral working time.
Â
Putty offers high detail reproduction and the same consistency and insertion force as conventional hand-mix putties. Without the potential for negative interaction between putty and glove.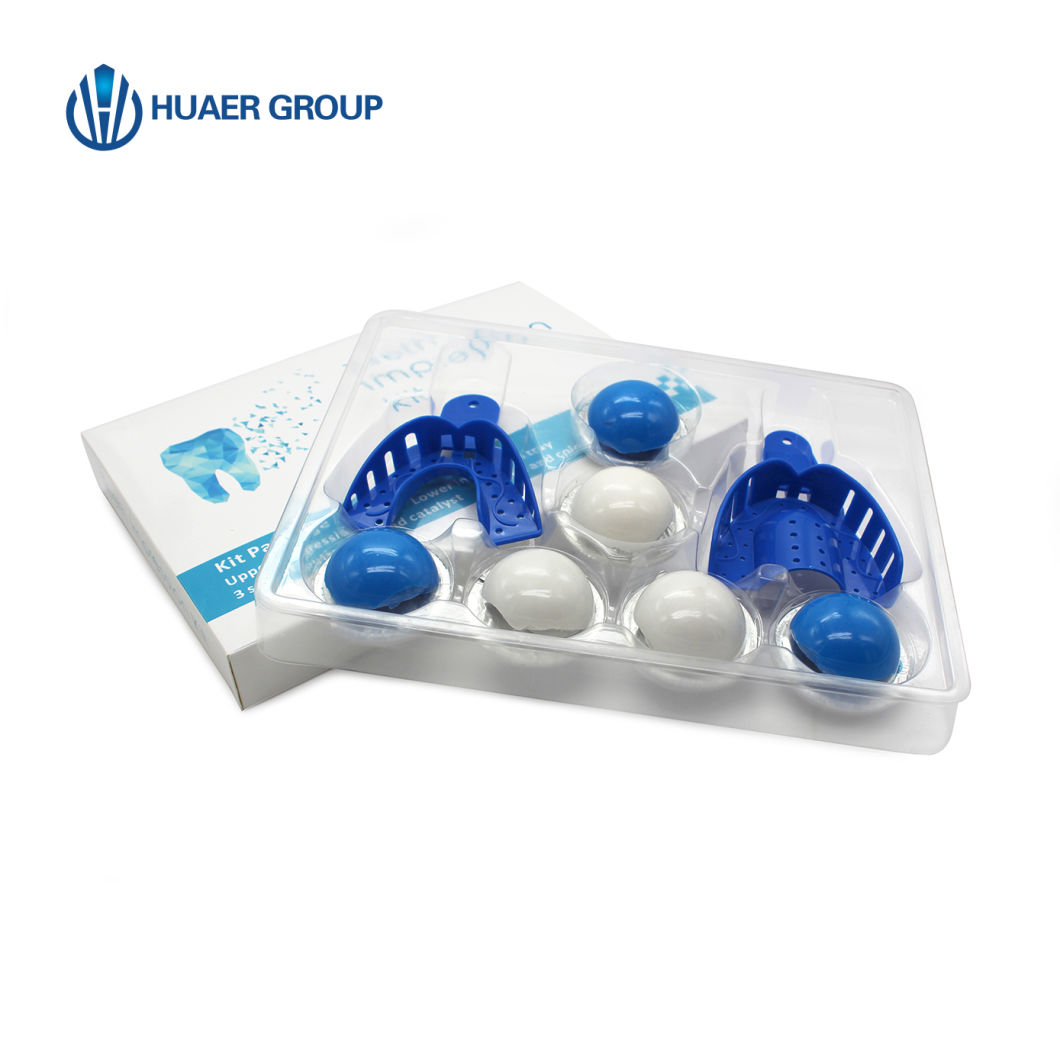
Â
2...Composition:Â
vinyl polysiloxane, silica, food class fillings, Pt catalyst.
The product has supreme restoration property, thixotropic property, shape stability, and hydrophilicity, with no offensive smell.
The silicone of addition type has two kinds-putty and wash which are both used clinically with one-step and two-step method impression process.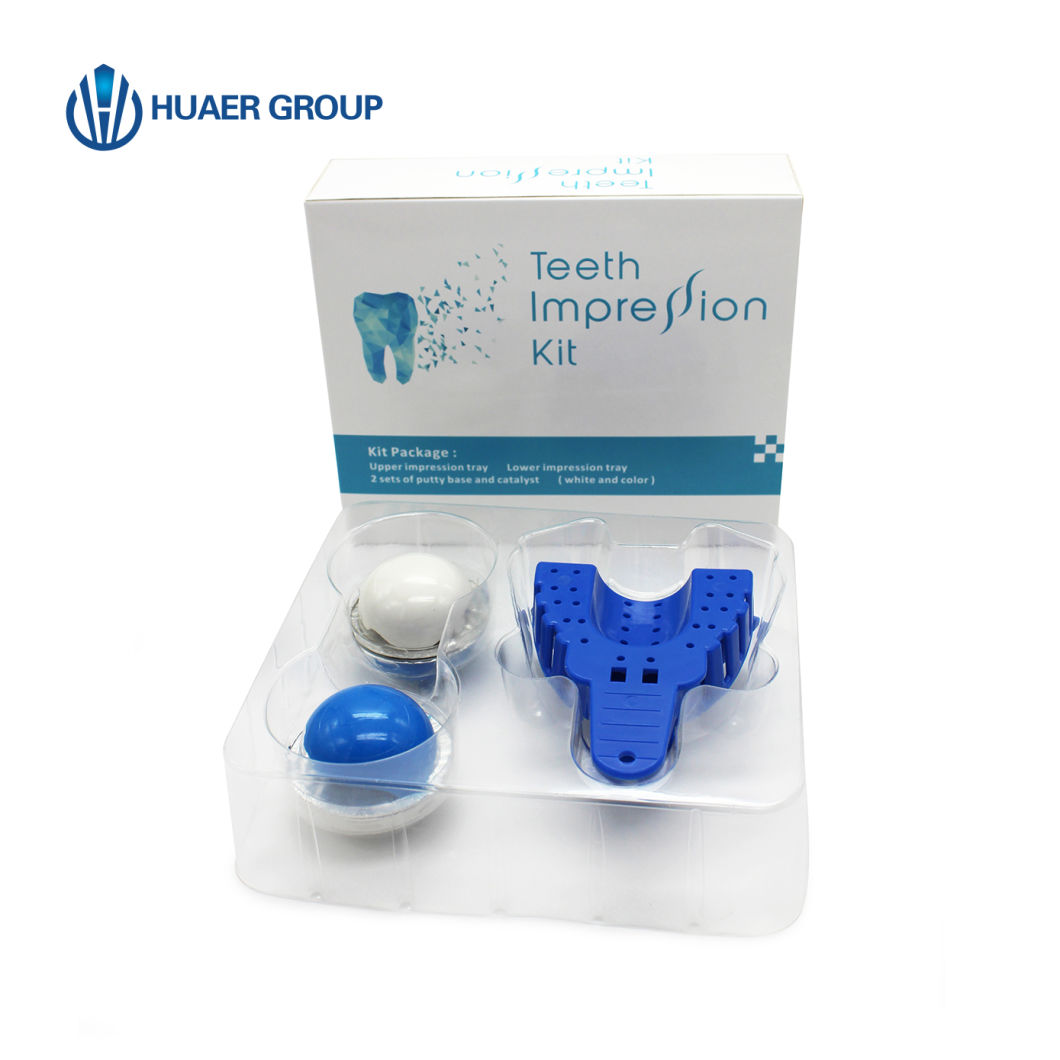
3...Technical data:
Working time
Putty-1 min. and 30sec.Wash-1 min
Consolidation time
Putty-<4 min. Wash-5 min
Mixing time
45s
Max. compressive deformation
<1.0%
recovery of elasticity
:>99.0%
Max. dimensional change
after 24h within 0.3% and after 336h within 0.3%
4...How to use ?
We recommend that you have to hand a timer so you can time the stages which will be explained later. A mirror so you can see you have placed the impression tray as per the instructions. Please remove any dentures, plates or retainers before you start the impression process.
ESSENTIAL REQUIREMENTS:
Stopwatch to time the stages it is essential to follow the times in all steps.
Mirror - to help take a good impression
Please read all the steps before you start.
Please remove any dentures before impression taking.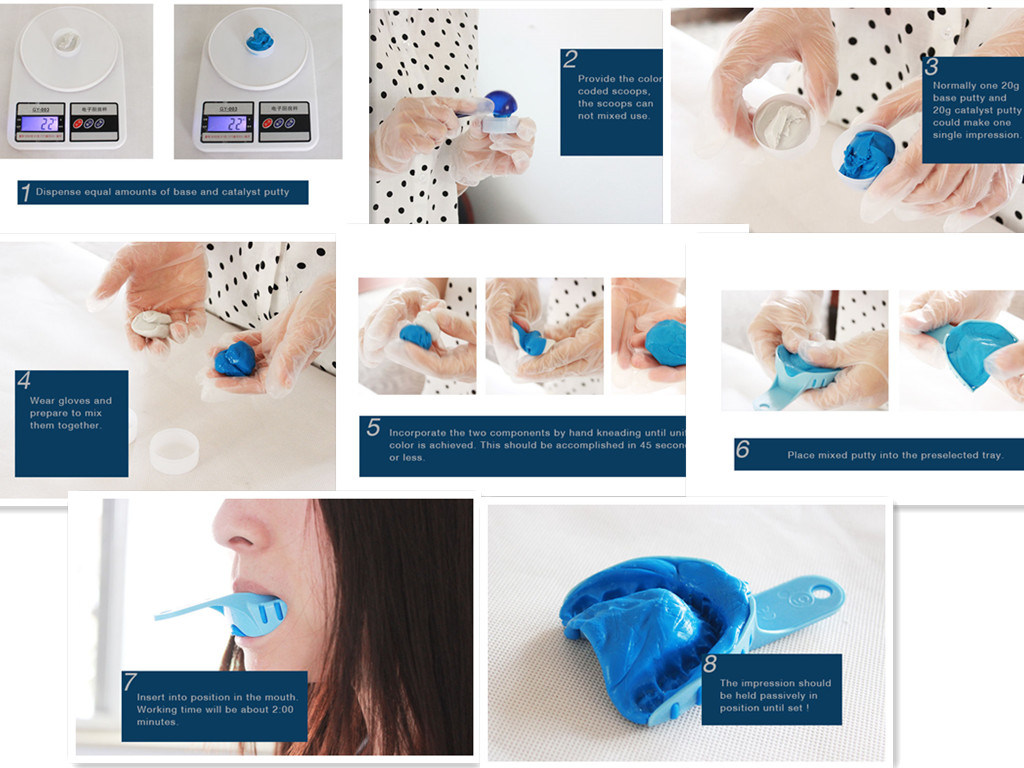
Step 1: Prepare For Impressions
Before you begin to make impressions, start by brushing and flossing thoroughly. Clean teeth are important for the perfect impression.
Step 2: Mix Catalyst &Â Base Paste
Remove 1 set of catalyst (white) and base (blue) paste from their container and begin mixing them until they become a solid blue.
Mix the two pastes for exactly 45 seconds.
Do not mix and prepare both trays at once (repeat steps 2Â through 4Â for the upper and lower teeth).
Mixing the catalyst and base paste triggers a hardening process that occurs within roughly a total of 4 minutes. In the event you make an error on one of your impressions, the teeth whitening tray creation kit comes with 3 sets of material.
Â
Step 3: Place Mixed Putty In Tray
Set putty in the tray. Make an effort to spread it evenly within 30 seconds.
Once set, let it sit for 1Â minute before progressing to step 4. The red arch shown on the image represents the best position forÂ
your teeth when taking the impression in step 4.
Â
Step 4: Make Impressions
Position your teeth in center of the impression material to avoid the teeth from coming in contact with the walls of the impression tray.Â
Using your hands you will press the material into your teeth.Â
The impression material should cover your gum lines.
Do not remove until 1:30 minutes has passed. Do not wiggle when removing the semi-hardened impressions from your mouth. Once removed from your mouth, let the impressions sit for 30 minutes.
GOOD IMPRESSION
You can see all of your teeth clearly in the impression tray.
You can see a deep outline of your gum above your teeth.
Â
BAD IMPRESSION
Teeth look stretched or distorted.
Bite is shallow.
No gumline is visible.
PLEASE NOTE:
During hot summer months please store your impression putty in the refrigerator before use.
The impression putty should be allowed to warm up to room temperature before use.
The impression putty is a commonly used high grade dental impression material. Material safety data information available on request.
5...Payment &Â Shipping:
Delivery time: Within 3-5 working days after receipt of the payment;
Shipping way: DHL, EMS, UPS etc express door to door or air cargo;
Certificate: CE approved;
Payment: T/T, Western union, Paypal, Trade Assurance.
6...Company Information:
Zhengzhou Huaer Electro-Optics Technology Co., Ltd. has been established in 2006 and we has become one of the leading manufacturers for portable dental units, dental hand-pieces, teeth whitening lamps, teeth whitening kits, dental impression putty, etc. Our products are CE and SFDA certified. Over 10 years of successful overseas business is a result of our global standard of superior quality, competitive price, safe packaging, and meeting delivery schedules. OEM and customized orders are both available.
Our principle lies in "fidelity management and technology innovation." We are committed to supply the best quality dental equipments and to bring satisfaction to our customers. Our doors are open at all times for new partners around the world.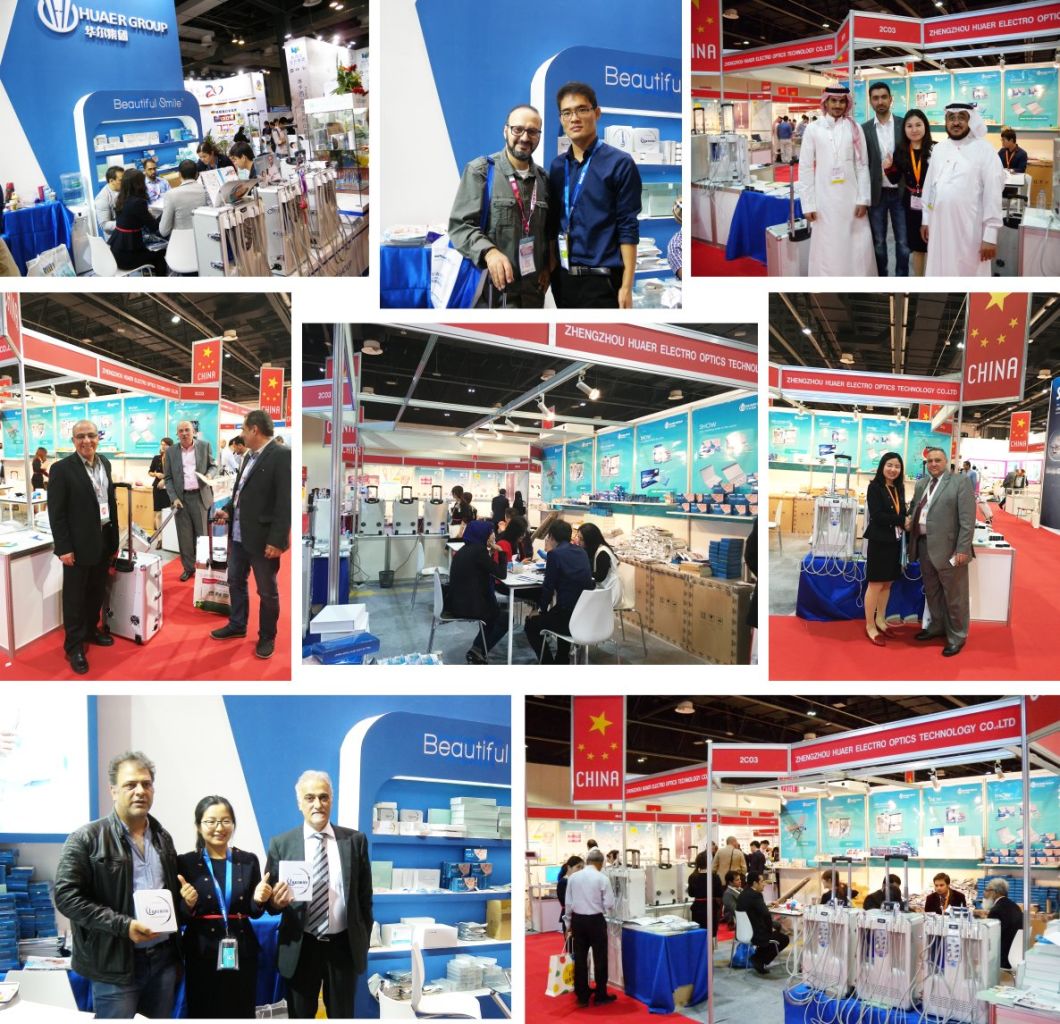
Contact Information:
Â
FAQ:
Are impressions easy to take?
Yes, the teeth impressions only take 5 minutes per arch and you only have to get it right once and then we store your impressions for years.
Â
Do you supply practice materials if I have never done this before?
Yes, each impression kit comes with enough practice putty to do a full practice impression so you can get familiar with the process before you take your final impressions.
Â
Can I send a teeth device in the place of teeth impressions?
No, the lab is not able to use a teeth device in the place of an impression or mold.
Â
If I have to retake an impression do I wait and send both in at the same time or do I send them in one at a time?
Yes, if upper and lower impressions are required by the lab, you must send in both impressions at the same time.
Â
Can I take an impression over the top of a permanent bonded retainer?
Yes, the lab will place wax over the top of the permanent retainer while making the removable retainer so it will not interfere with it when wearing.
Â
Is it important to mix the impression putty until it is a solid color?
Yes, in order for the impression putty to harden properly, during the impression process, the 2 colors of putty must become a solid color.
Â
Do I need to let the impression putty harden all the way before removing it from my mouth?
Yes, if you take the impression tray out of your mouth before the putty is totally hardened, it will get distorted and cause your completed teeth device not to fit your teeth.
1...Production Description:
Putty Impression Material provides all the benefits of a true putty, including higher consistency and insertion force than heavy body materials. Plus, it is designed exclusively for use with Mixing Unit-enabling reliable and reproducible dosage.
Â
All impression materials get warmer-and therefore set faster - when placed in the mouth. Putty material exits the 2 unit at approximately 97ºF, because Putty is already warm when it is seated in the mouth, it helps warm up the wash material, actually accelerating setting time without reducing the intra oral working time.
Â
Putty offers high detail reproduction and the same consistency and insertion force as conventional hand-mix putties. Without the potential for negative interaction between putty and glove.
Â
2...Composition:Â
vinyl polysiloxane, silica, food class fillings, Pt catalyst.
The product has supreme restoration property, thixotropic property, shape stability, and hydrophilicity, with no offensive smell.
The silicone of addition type has two kinds-putty and wash which are both used clinically with one-step and two-step method impression process.
3...Technical data:
Working time
Putty-1 min. and 30sec.Wash-1 min
Consolidation time
Putty-<4 min. Wash-5 min
Mixing time
45s
Max. compressive deformation
<1.0%
recovery of elasticity
:>99.0%
Max. dimensional change
after 24h within 0.3% and after 336h within 0.3%
4...How to use ?
We recommend that you have to hand a timer so you can time the stages which will be explained later. A mirror so you can see you have placed the impression tray as per the instructions. Please remove any dentures, plates or retainers before you start the impression process.
ESSENTIAL REQUIREMENTS:
Stopwatch to time the stages it is essential to follow the times in all steps.
Mirror - to help take a good impression
Please read all the steps before you start.
Please remove any dentures before impression taking.
Step 1: Prepare For Impressions
Before you begin to make impressions, start by brushing and flossing thoroughly. Clean teeth are important for the perfect impression.
Step 2: Mix Catalyst &Â Base Paste
Remove 1 set of catalyst (white) and base (blue) paste from their container and begin mixing them until they become a solid blue.
Mix the two pastes for exactly 45 seconds.
Do not mix and prepare both trays at once (repeat steps 2Â through 4Â for the upper and lower teeth).
Mixing the catalyst and base paste triggers a hardening process that occurs within roughly a total of 4 minutes. In the event you make an error on one of your impressions, the teeth whitening tray creation kit comes with 3 sets of material.
Â
Step 3: Place Mixed Putty In Tray
Set putty in the tray. Make an effort to spread it evenly within 30 seconds.
Once set, let it sit for 1Â minute before progressing to step 4. The red arch shown on the image represents the best position forÂ
your teeth when taking the impression in step 4.
Â
Step 4: Make Impressions
Position your teeth in center of the impression material to avoid the teeth from coming in contact with the walls of the impression tray.Â
Using your hands you will press the material into your teeth.Â
The impression material should cover your gum lines.
Do not remove until 1:30 minutes has passed. Do not wiggle when removing the semi-hardened impressions from your mouth. Once removed from your mouth, let the impressions sit for 30 minutes.
GOOD IMPRESSION
You can see all of your teeth clearly in the impression tray.
You can see a deep outline of your gum above your teeth.
Â
BAD IMPRESSION
Teeth look stretched or distorted.
Bite is shallow.
No gumline is visible.
PLEASE NOTE:
During hot summer months please store your impression putty in the refrigerator before use.
The impression putty should be allowed to warm up to room temperature before use.
The impression putty is a commonly used high grade dental impression material. Material safety data information available on request.
5...Payment &Â Shipping:
Delivery time: Within 3-5 working days after receipt of the payment;
Shipping way: DHL, EMS, UPS etc express door to door or air cargo;
Certificate: CE approved;
Payment: T/T, Western union, Paypal, Trade Assurance.
6...Company Information:
Zhengzhou Huaer Electro-Optics Technology Co., Ltd. has been established in 2006 and we has become one of the leading manufacturers for portable dental units, dental hand-pieces, teeth whitening lamps, teeth whitening kits, dental impression putty, etc. Our products are CE and SFDA certified. Over 10 years of successful overseas business is a result of our global standard of superior quality, competitive price, safe packaging, and meeting delivery schedules. OEM and customized orders are both available.
Our principle lies in "fidelity management and technology innovation." We are committed to supply the best quality dental equipments and to bring satisfaction to our customers. Our doors are open at all times for new partners around the world.
Contact Information:
Â
FAQ:
Are impressions easy to take?
Yes, the teeth impressions only take 5 minutes per arch and you only have to get it right once and then we store your impressions for years.
Â
Do you supply practice materials if I have never done this before?
Yes, each impression kit comes with enough practice putty to do a full practice impression so you can get familiar with the process before you take your final impressions.
Â
Can I send a teeth device in the place of teeth impressions?
No, the lab is not able to use a teeth device in the place of an impression or mold.
Â
If I have to retake an impression do I wait and send both in at the same time or do I send them in one at a time?
Yes, if upper and lower impressions are required by the lab, you must send in both impressions at the same time.
Â
Can I take an impression over the top of a permanent bonded retainer?
Yes, the lab will place wax over the top of the permanent retainer while making the removable retainer so it will not interfere with it when wearing.
Â
Is it important to mix the impression putty until it is a solid color?
Yes, in order for the impression putty to harden properly, during the impression process, the 2 colors of putty must become a solid color.
Â
Do I need to let the impression putty harden all the way before removing it from my mouth?
Yes, if you take the impression tray out of your mouth before the putty is totally hardened, it will get distorted and cause your completed teeth device not to fit your teeth.
Clip on Veneer Use Dental Impression Material
Model NO.: HR-SM
Medical Device Regulatory Type: Type 2
Medical Devices Ad. Approval No.: 20142630088
Item Name: Dental Impression Material
Ingredients: Base and Catalyst
Weight: 20g and 350g
Mixing Time: 25s
Certificate: Ce Approved
Working Time: Putty-1 Min. and 30sec.Wash-1 Min
Consolidation Time: Putty-<4 Min. Wash-5 Min
Recovery of Elasticity: >99.0%
Colors: White, Blue, Pink
Trademark: Huaer or OEM brand
Transport Package: Standard Export Packing
Specification: A class
Origin: Henan, China
HS Code: 39100000
Popular Clip on Veneer Use silicone impression putty (HR-GY03):Zhengzhou Huaer Electro-Optics Technology Co., Ltd.
Â
Add:No.79 Zhenghua Road, JinshuiÂ
district,Zhengzhou,China
Â
Tel: 86 371 86097309Â Â Fax: 86 371 69067368Â
Web:Â http://www.cnhuaer.com.cn
Zhengzhou Huaer Electro-Optics Technology Co., Ltd.
Â
Add:No.79 Zhenghua Road, JinshuiÂ
district,Zhengzhou,China
Â
Tel: 86 371 86097309Â Â Fax: 86 371 69067368Â
Web:Â http://www.cnhuaer.com.cn